How to run a retrospective (remotely)

Retrospectives can be an incredibly important part of any product team's process. At Jam, we do 15-30 minute retrospectives after every major feature ships, and after every production incident.
Retrospectives have had incredible impactful at Jam. Many of the ways we do things now are a direct result of a takeaway that emerged in a retrospective. Frequent retrospectives give us an opportunity to trial & error new processes and keep iterating on how we work together.
Fortunately, retrospectives are not too hard to do, especially remotely. This is good news — they are essential to making sure you grow as a team, and learn from any mistakes and don’t repeat them. So, let's dive right into how you can run a retrospective remotely. 👇
When to run a retro?
There are four main times teams run retrospectives (they usually do some of these, not all of these):
- At the end of each sprint – this is part of the agile product development philosophy, to hold a quick retro every 2 weeks to reflect on the most recent sprint and suggest working improvements for the next one.
- After major projects are completed – usually waiting one week after the project is completed to see if any consequences emerge is helpful.
- After a major incident – such as production downtime.
- At some other regular cadence such as at the end of each quarter.
How to run a remote retrospective
While things might be a little different in our new remote world, retrospectives are definitely quite easy to do with a few minor adjustments. Here's how to run one:
Step 1. Decide who needs to be there
First think about who will need to be at the retro (often fewer people is better because it gives more safety and space to those attending to speak openly).
Make a list of the core people involved in the process. For example, just the core developer, designer, PM for a project retro, or if another person played a heavy role (such as the PMM or QA) you would also invite them too.
Step 2. Get buy in
Like with any time you give feedback, you want to get buy in from the other parties involved before launching into a feedback session. That way, everyone gets in the right mindset and opens up to the process, and also so that it doesn't feel like you are implying criticism on the recently completed project or like you are setting people up for a nerve-racking critique session.
If you have retrospectives as a normal part of your product development process or at a normal cadence, buy in is implied – you don't need new buy in each time.
But if your team doesn't have a history of frequent retrospectives, you'll want the team to buy in before you schedule it.
You can get team buy-in verbally or over chat. When you get buy in, you will want to:
- Give context about why now – that could be "I was thinking it could be nice to try retros, starting with a retro for this project" or "That was such a major project, I'd love for us to reflect what we want to keep doing / do differently next time" or "I noticed this project went way off schedule, should we hold a short retro to come up with ideas how to avoid that for next time"?
- Explain what exactly you mean by retro, such as "brainstorm what we want to keep doing and do differently for next projects"
- Frame it positively and constructively - so folks know they are not walking into a roast.
- Keep it short – to keep the pressure light.
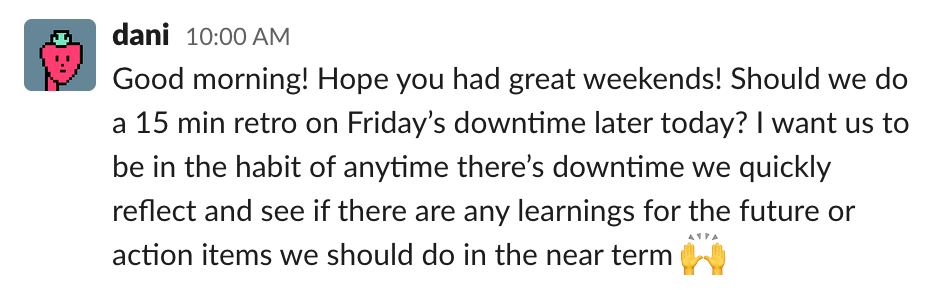
Here's an example from our team Slack of getting buy in for a retro:
Step 3. Schedule your retrospective and set expectations
Of course, make sure you find a time that works well for everyone.
Depending on how complex the project you are retrospecting on was, you can book slightly more time than you need. For example, you can book 45 minutes for a 30 minute retro. Let people know you expect to wrap earlier, but you're booking a 15 minute buffer just in case.
Typically it makes sense to do the retro sooner rather than later, while the project or sprint is fresh in everyone's minds.
However, for feature retros, it's nice to wait about a week after the feature ships to wait and see if any production issues arise as a result of the feature that should be discussed in the project retro.
When you send out the calendar invite for the retrospective, you can give your team a little bit of what to expect, and nudge them to think ahead. For example, in the calendar invite description, you can write something like:
"We're going to discuss 1) what went well and we want to keep doing in future projects, and also 2) what we'd like to try and do differently next time. Please give it a couple minutes of thought before we meet."
Step 4. Choose a retrospective format
You'll want to choose how to structure your retrospective format.
There are several retrospective formats to choose from – here are the most common, but you can also DIY your own:
1. Keep doing, do differently, open questions
This is the format we use at Jam. Team members brainstorm what went well and they want to keep doing in future projects, what didn't go well and they want to try another way in future projects, and what open questions they have.
We use this format because it's solutions oriented. Instead of only thinking about what didn't go well, everyone is nudged to think more constructively about what they want to try instead in the future.
Open questions is helpful to surface topics of discussion or future investigations such as "is there a better way for us to do production rollbacks?".
2. Happy, Sad, Confused
In this format, team members will look back over the past project or sprint and discuss what made them happy, what made them sad, and what confused them. These discussions can help the team better understand what to avoid, double down on, and what requires some more clarity going forward.
This is much more "feelings" oriented than the above format.
Happy, Sad, Confused is particularly helpful in a remote setting because it enables team members to bring up what they find confusing specifically. Several things can confound team members when working remotely, and they don't always know who to ask — so this helps with that.
One downside to this format, is the "sad" section lets folks bring up what they didn't enjoy, but doesn't push them to start thinking about solutions, so if you choose this format, you may want to include time for solutions brainstorming too.
3. Liked, Longed, Lacked, Learned
This format basically takes team members over what they liked in the previous weeks, what they long for in the upcoming weeks (e.g. what they hope to see), what the previous weeks lacked, and any lessons they may have learned from the week that they would like to share.
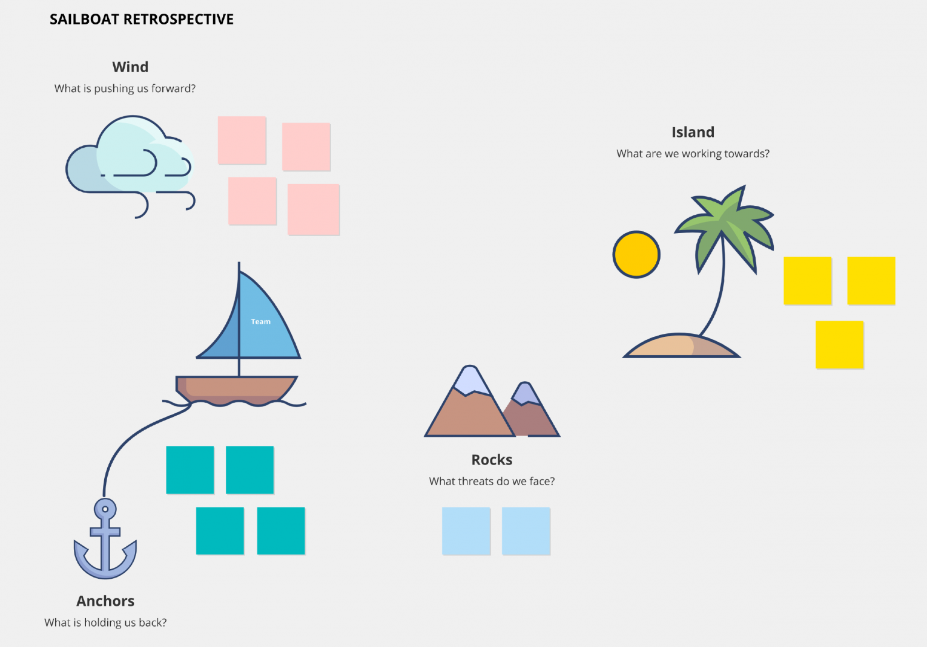
4. Sailboat
The sailboat format is just a metaphor to get the team to look at the bigger picture during a retrospective. It's a little cheesy, but the wind represents the factors propelling the team forward. The rocks are obstacles, and anchors represent anything that’s holding the team back or simply needs to go. If you like metaphors, take this format for a sail 😉.
5. Combine any of the above formats with a timeline
When a project had many different distinct phases to it, it's helpful to break up the retro sections by the project timeline. For example, what do we want to keep doing, do differently, and open questions for the planning phase, for the development phase, and for the QA phase?
Diving up the retro by timeline is helpful for longer projects because it helps teammates think about every phase of the project instead of just what happened most recently, which is usually what's top of mind.
Feel free to DIY, of course!
Since every organization is unique, what works at one may not work everywhere. So it’s not always the best idea to follow a predefined template for a retrospective. Feel free to DIY and experiment with your own.
Step 5. Setup your retro format in your remote-friendly tool of choice
There are several great tools that facilitate group brainstorming, including useful Chrome extensions for developers designed for collaboration. The only requirement is that it's some sort of free-form collaborative doc, where multiple people can write at the same time without interrupting each other.
You can use any whiteboarding or document-writing tool for retrospectives. At Jam, we use FigJam for retrospectives (because we like its name 😆, and because it's a great tool), but you can use any whiteboard or document tool.
Once you've chosen a tool, you'll want to create a new doc ahead of time for your retrospective and create sections in that doc based on the format you chose. (For example, before every Jam retrospective, I create a new FigJam file with sections for "Keep doing", "Do differently", and "Open questions".
Step 6. Start your retrospective
When the retro begins, you should set the stage by letting folks know your expectations. Are we making decisions here or just brainstorming? Should folks be problem-oriented (pointing out problems) or solutions-oriented (making an effort to come up with solutions to problems)? Framing what you are hoping to get out of the session makes a big difference.
You should also frame for the group how you will spend the time. For example, you can say: "We are going to brainstorm independently for the first 5 minutes. Then each person is going to take a turn to present. And if there's any extra time we can discuss things further. We'll end right at the hour. How does that sound?"
Step 7. Run your retro!
You'll want to start by giving people some heads-down time to think independently and write down their own ideas. Typically, we will give everyone about 5 minutes to jot down all their thoughts as sticky notes in our FigJam document, in each section of the document. During this time, there's lots of Zoom silence, so we will play some tunes 😁.
Independent time to think helps get all the best ideas out, without there being fighting for air time.
At 5 minutes in (or however much time you gave everyone), or when you notice the typing has slowed down, you can wrap up that independent section.
Next, you can either: give everyone time to independently read everyone else's sticky notes and give +1's, flag things for discussion or write comments & questions, or you can have each person share screen and present the sticky notes they wrote.
We always do the latter – each person shares screen and quickly talks through every sticky note they wrote. As people talk through their notes, anyone can jump in and discuss that topic. Short conversations come up ad-hoc as people share their sticky notes.
At the end, we open the door for any remaining discussion, questions, thoughts, reactions.
Before wrapping up, try your best to summarize everything that’s been discussed, and voila! You’ve just carried out a successful remote retrospective. Go you!
Step 8. Be the time keeper
Make sure to end on time. No one likes a retro (or any meeting) that goes on past the time.
To make sure the important points get out before the time ends, you should help keep everyone on time, letting them know when there's 10 minutes left, 5 minutes left, 2 minutes left, etc.
You can also help flag when a single topic has gone on for too long, and should be continued in a follow up conversation/meeting.
Step 9. Send out the notes & thank everyone for participating
Send out the link to the doc, and thank everyone for the helpful discussion.
If your team has an internal a knowledge base, you may want to put the notes from the retro somewhere in that knowledge base to be referenced later.
That's it! Retros can be game-changing for any team's collaboration. Hope yours is helpful, actionable, and awesome!
~ Psst – building products? Try out Jam, the Chrome extension that makes it crazy fast to capture and share bugs with developers, in a format that is perfect for developers. Get it for free at jam.dev ~