How to set up templates in Jira? — the ultimate easy guide

When it comes to project management software, Jira is widely considered one of the best tools around. It’s endorsed by a whopping 65,000 organizations worldwide, including the big-shots like Cisco, Spotify, Square, eBay, and Airbnb.
Although Jira is well-known for its ability in issue tracking, people still find themselves lost when creating issue templates for Jira.
So, how can you do it within minutes?
This article will guide you through 4 quick & easy steps to create and customize templates for Jira.
Let's get started! 👇
What is a Jira template?
A template is a Jira issue that gets created in the Template Repository (TEMP). It shows up right after you install the Issue Templates for Jira add-on (which you will need to do!).
The fantastic part here is a single template can be replicated many times. You can copy the fields and their contents into new issues you create. As you might imagine, this comes in handy when you create lots of similar tasks.
What’s more, it even lets you copy-paste values to chosen fields or freely create a complex set of issues linking to stories and subtasks.
Your jaw will drop when you learn how flexible a template is. It can represent a helpdesk ticket, project task, invoice, and even a leave request form.
So basically, you can freely set up issue templates that meet your specific needs. It’s completely yours.
4 steps to set up and fine-tune Jira templates
Jira gives you access to a library of ready-to-use sample templates (after installing the Issue Templates for Jira free add-on). To save time, you can use these issue templates directly by selecting one set of templates at a time.
Alternatively, it’s possible for you to create an issue template from scratch as well. We’ll walk you through the whole process now, so sit tight, guys!
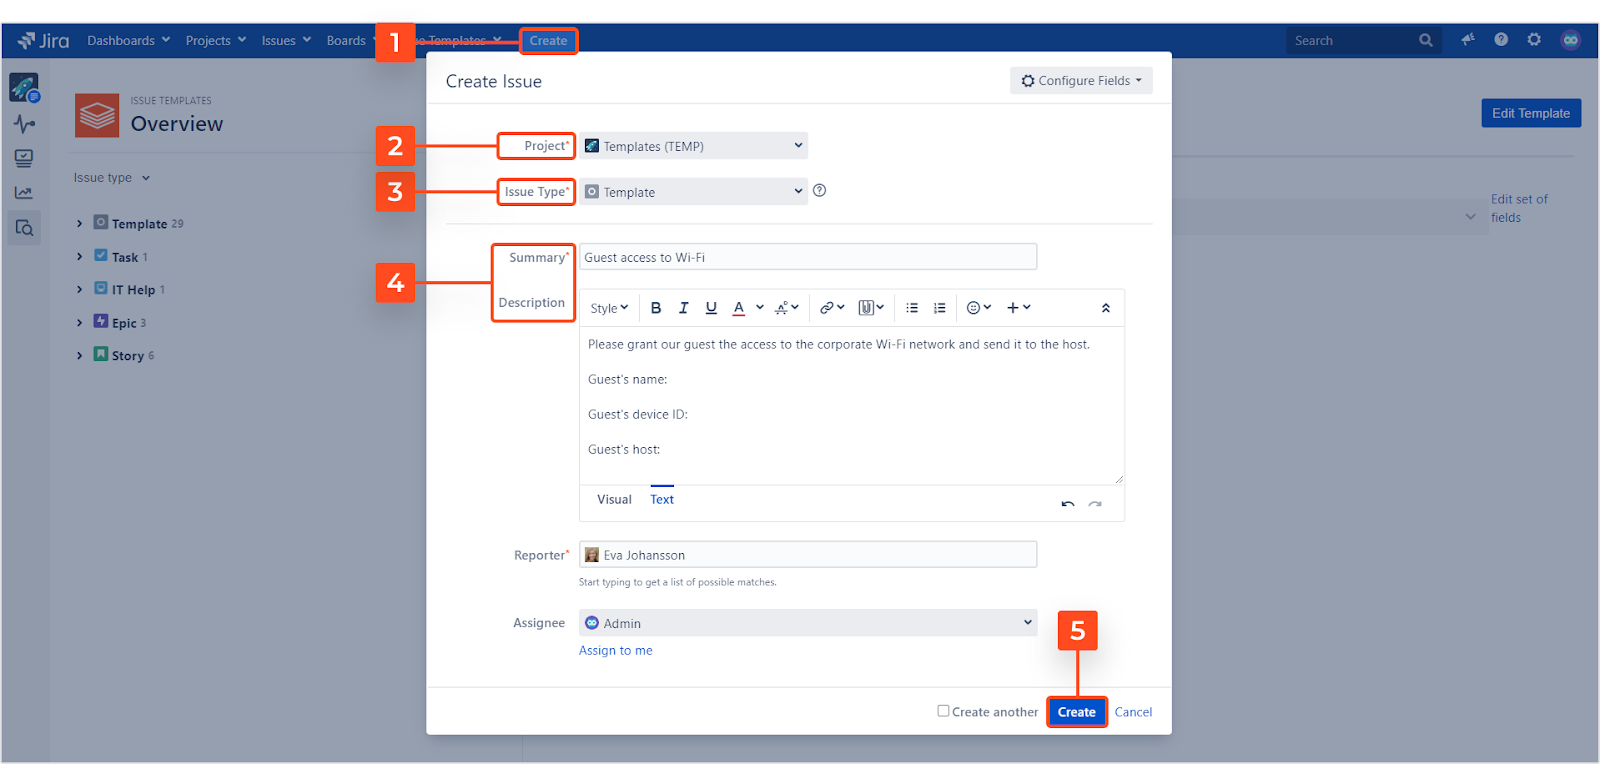
Step 1. Create a Jira template
To create a template, what you need to do is:
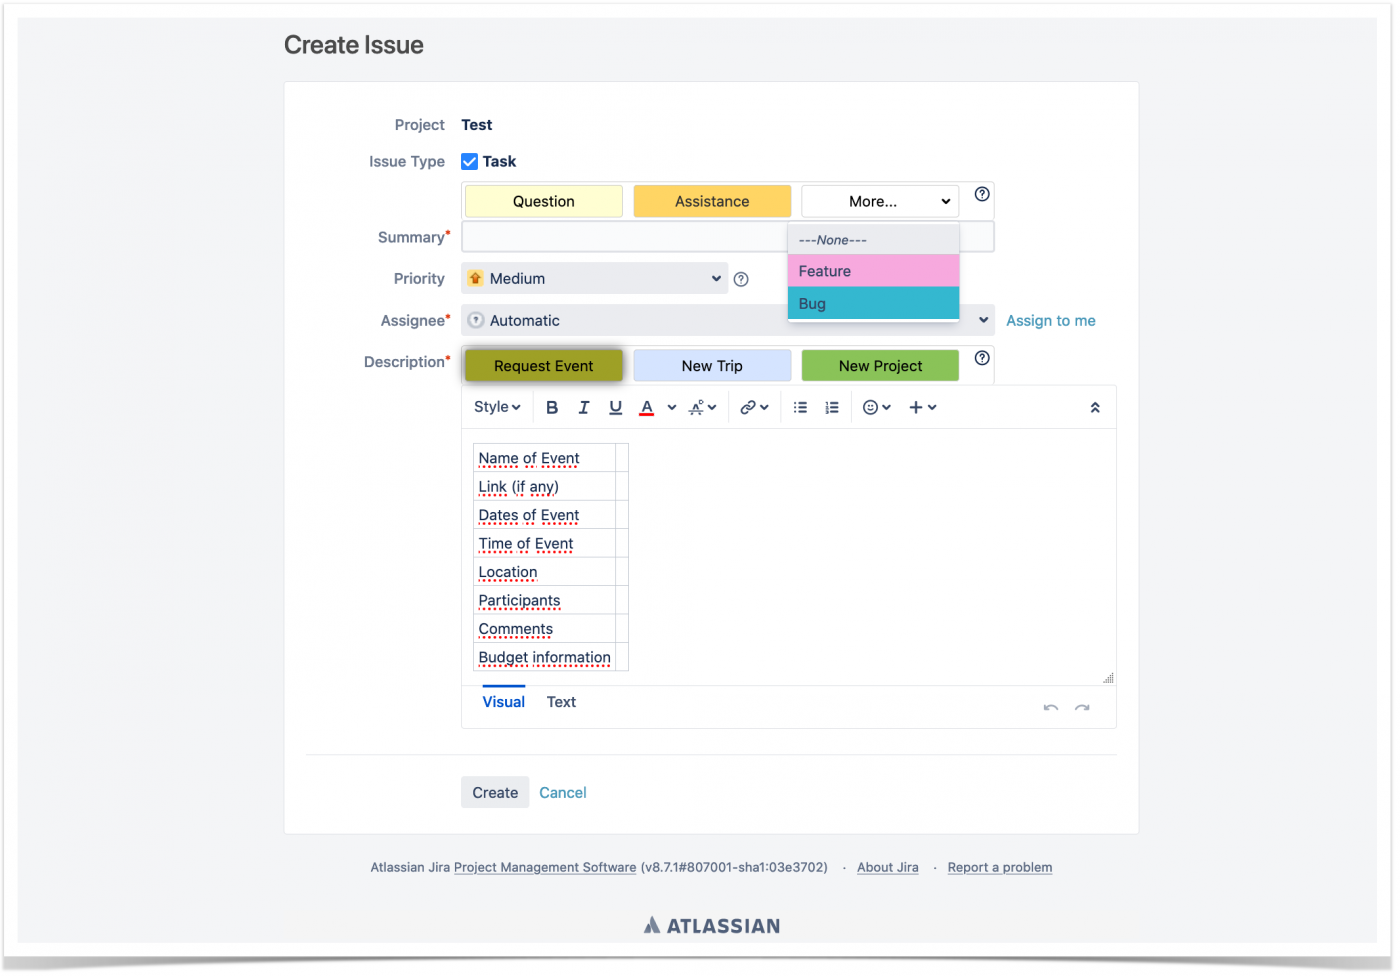
- Hit the “Create” option at the top of the screen to open the “Create Issue” screen, which appears in a dialogue box.
- Right in the “Create Issue” dialog box, choose the default Template Repository project called Templates (TEMP).
- In “Issue Type”, select “Template” in the dropdown menu.
- Next, enter the summary and description fields.
- Once done, click the “Create” button.
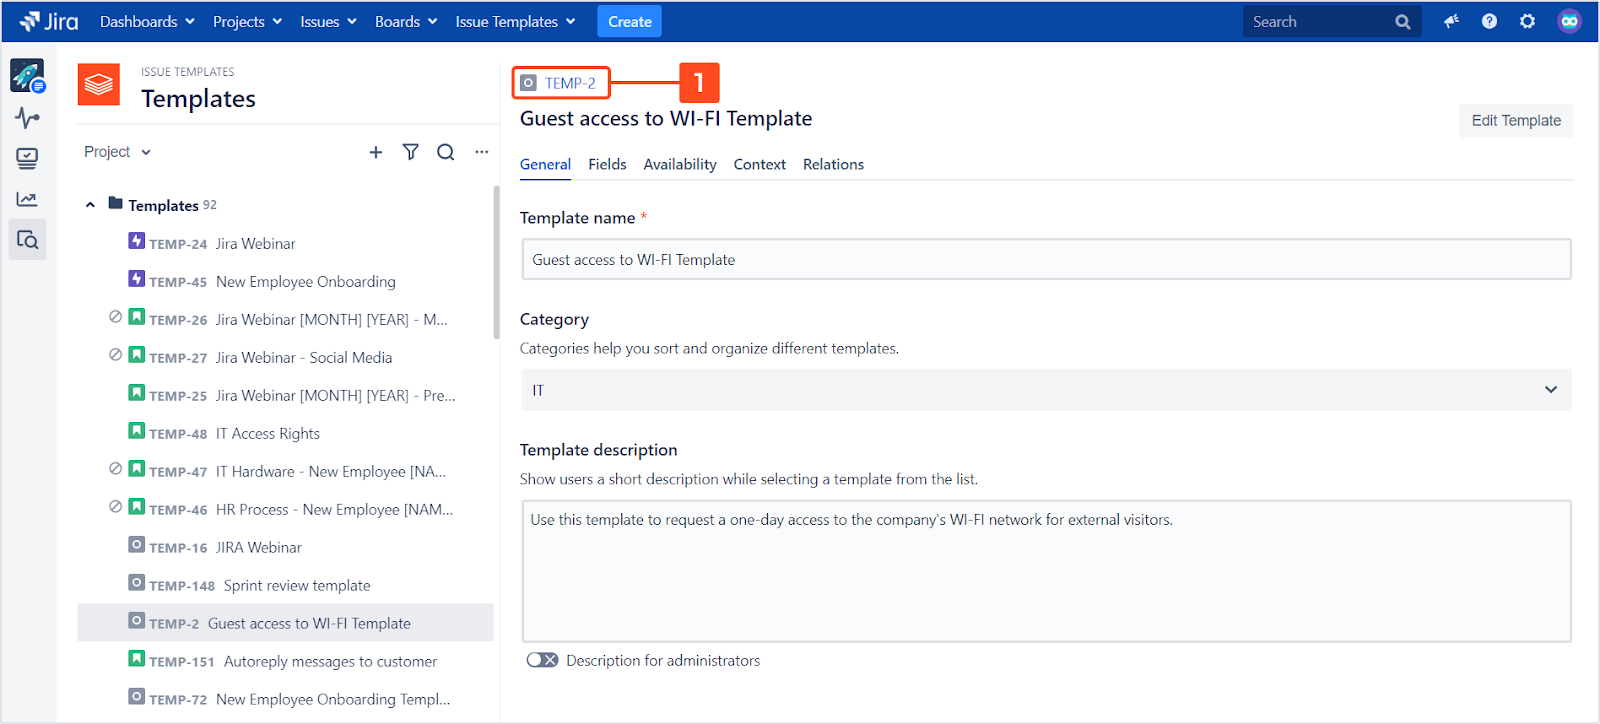
Step 2. Refine the newly-created template
There are two options to refine your newly-added template.
First, visit the Templates details panel and tweak the template’s settings.
Alternatively, improve the template’s contents in the extended issue view. Click the template’s issue key to open the view.
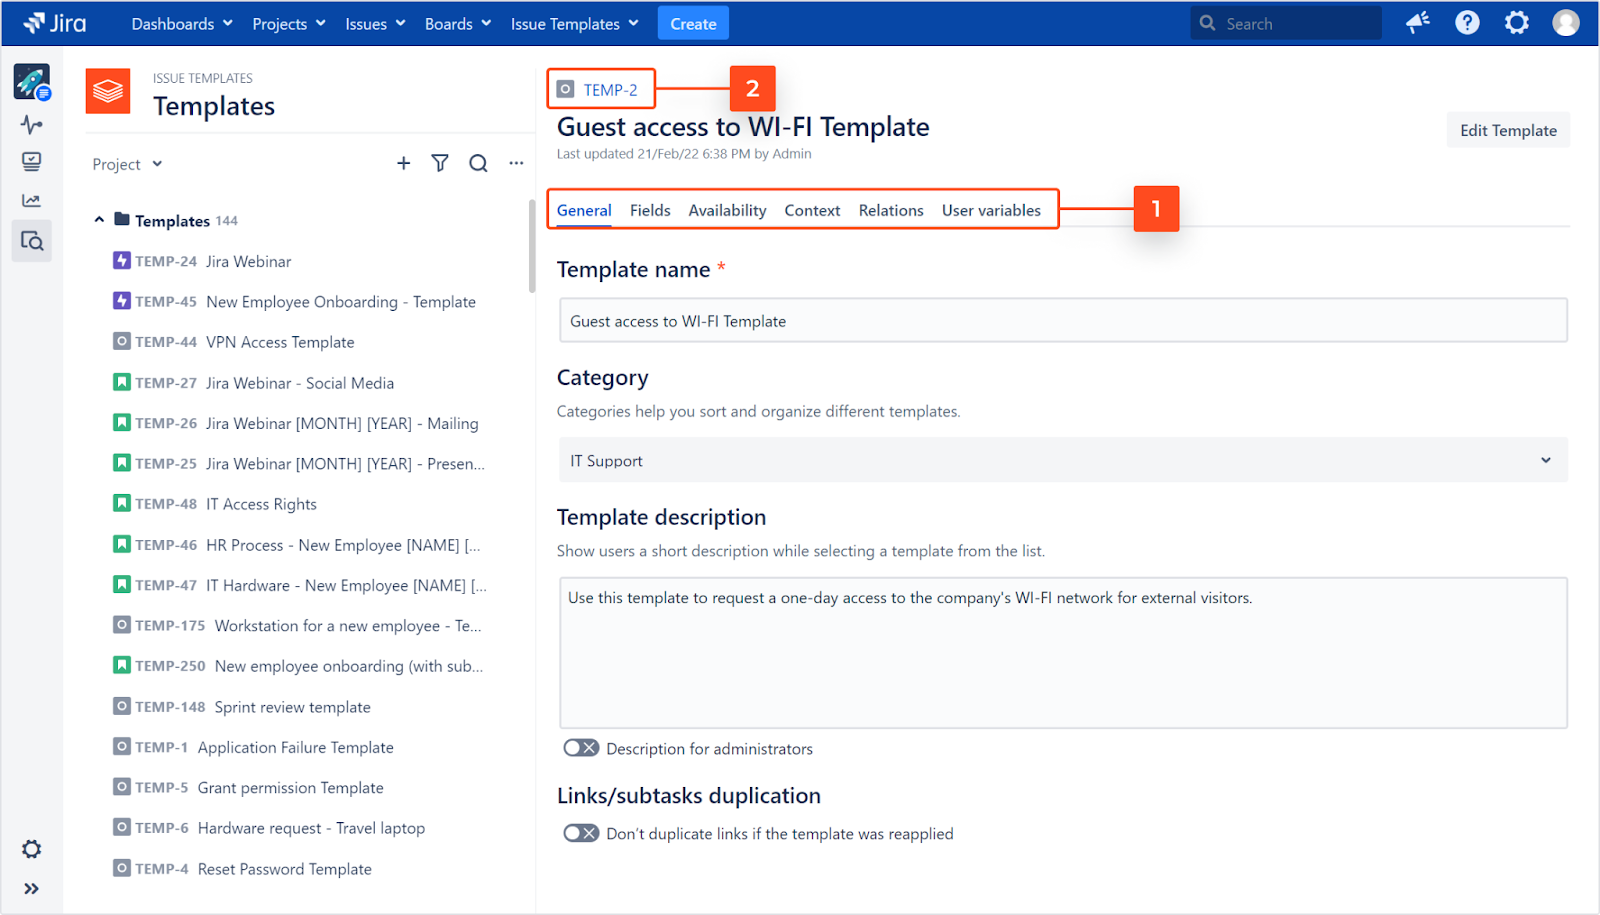
Source: Deviniti
Step 3. Edit the template
The amazing thing about Jira templates is that you can edit them anytime. Day? Yes. Night? Yes. 3am. Well yes, if you can’t sleep, I suppose. 🤪 All you need is the permissions for editing the template. After that, you’re good to go.
To edit your template, head over to the template you want to edit and click on the template’s “issue key.”
Then, hit “Edit”. Make the required changes in your chosen fields.
Next, click “Update” at the bottom of the page. This will save the changes that you made in the issue template.
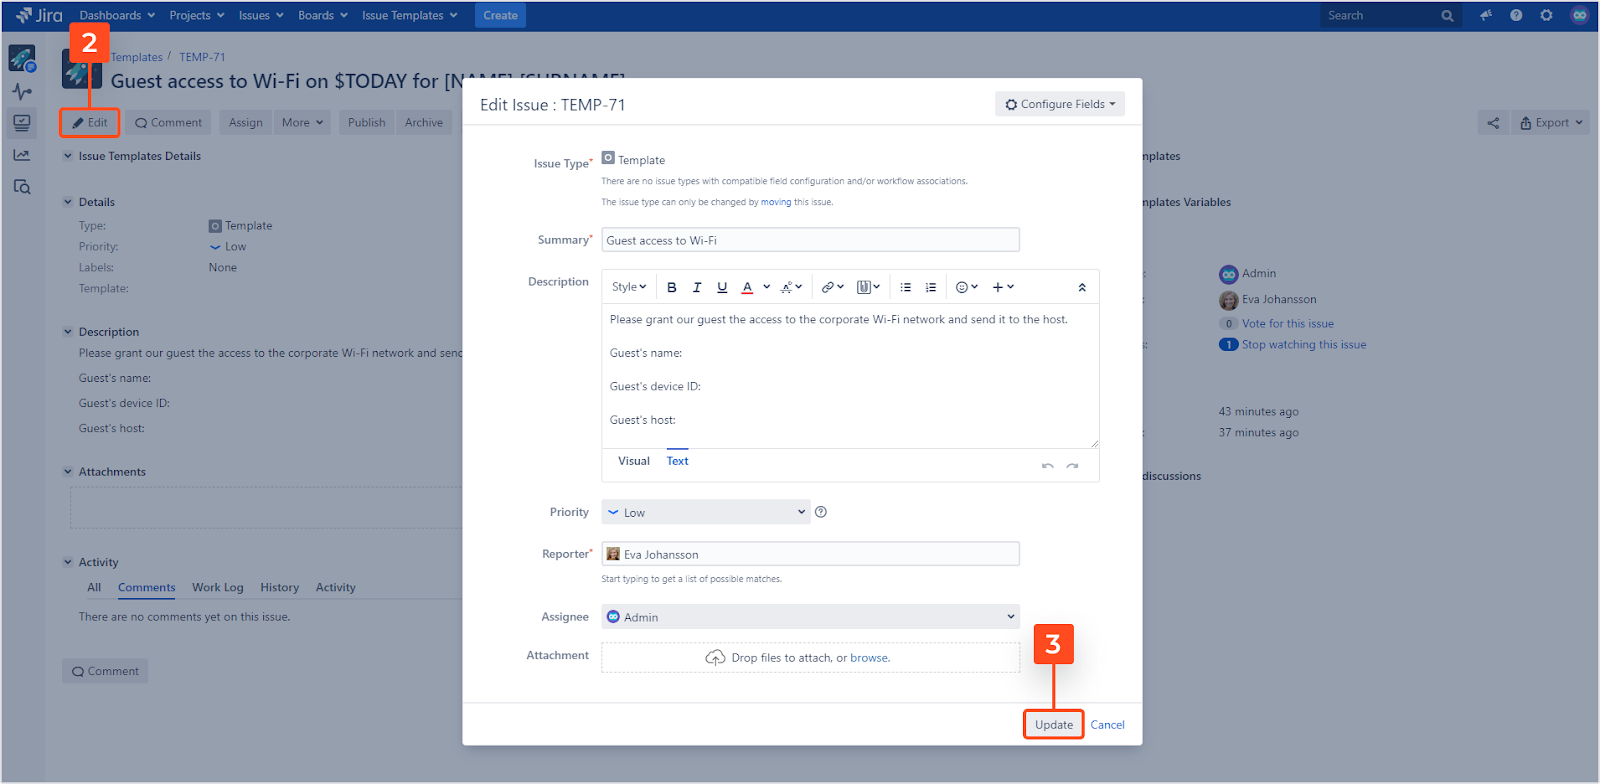
Alternatively, you may also click the “Edit Template” button. This opens the same Jira edit issue screen.
Step 4. Customize your Jira templates for different needs (optional)
Jira doesn’t include any built-in features that let you customize your templates. So, you need help from external apps for this.
One recommended app for this Field Templates for Jira.
With the handy help of Field Templates for Jira, you can create templates for both system and custom text fields. This splits the template’s visibility by project roles, issue screens, etc., and helps you adapt it to your needs easier.
Not only does it free you from creating issue descriptions, but it also allows you to combine templates, which significantly speeds up the issue creation process. Plus, it gives you the green light to create comment templates on both the project level and the individual user level.
And that’s it! You’re done! Woo! 🙌
Psst - need a faster way to create Jiras?
Jam helps product and project managers, QA testers, and any anyone working with engineers report bugs in Jira in 1 click. Console logs, network requests, and reproduction steps auto-included with our Chrome extension for Jira.
If you're looking for a 20x Jira workflow speed up, give it a try!